 English
 Indonesia
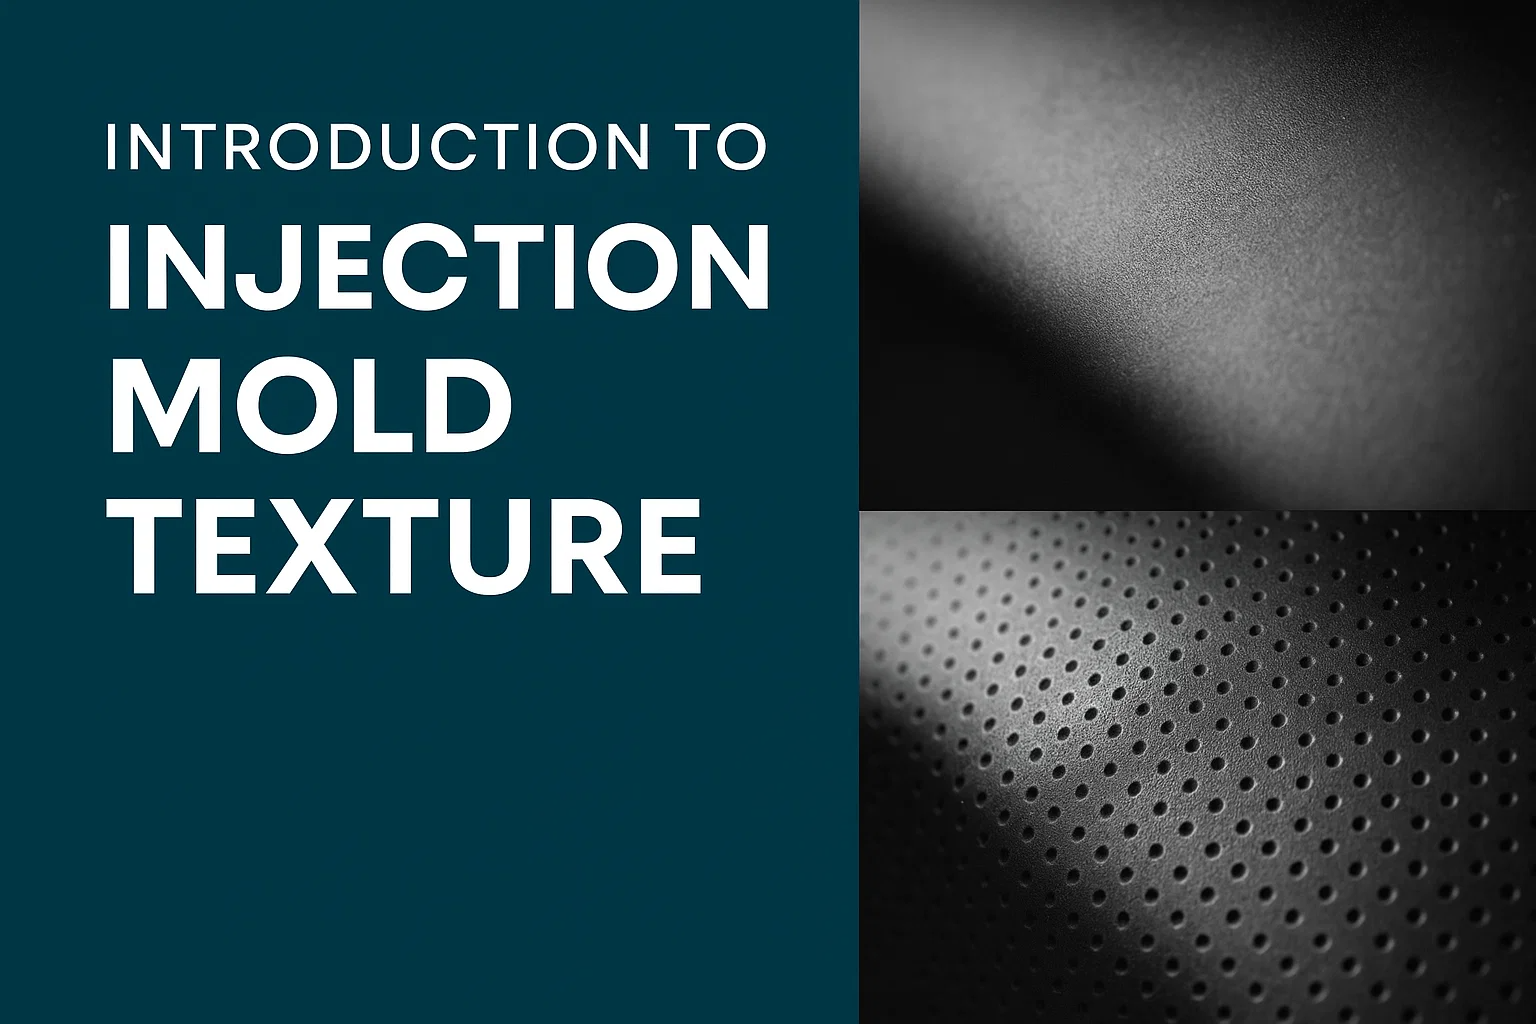
What is Mold Texture and How It Works
Mold texture, also known as surface finish, refers to the deliberate modification of an injection mold's cavity surface to transfer a specific, patterned finish onto the final plastic part. This process is about more than just aesthetics; it's a design and engineering decision that impacts a product's look, feel, and performance.
The fundamental principle is straightforward: the surface of the plastic part is an exact replica of the mold's internal surface. By altering the mold's steel cavity, we can achieve an incredible variety of textures, from high-gloss surfaces to matte finishes and complex patterns.
The process typically involves these steps:
-
Mold Preparation: The mold is first machined to the part's final geometry. The surface is then meticulously cleaned and prepared to ensure uniform texturing.
-
Texture Application: A specialized process, most commonly chemical etching or laser engraving, is used to create the desired pattern. Chemical etching uses acid to dissolve and create a pattern on the steel, while laser engraving uses a highly focused laser beam to ablate or melt the material with extreme precision.
-
Injection Molding: Molten plastic is injected into the textured mold cavity under high pressure. The high pressure ensures that the plastic fills every microscopic detail of the texture.
-
Replication: As the plastic cools and solidifies, it conforms perfectly to the mold's textured surface.
-
Ejection: The finished part, now bearing the a flawless copy of the mold's texture, is ejected.
Overview of the Benefits
The strategic use of mold texture offers a wide range of benefits that go beyond simple aesthetics:
-
Aesthetic Enhancement: Textures can create a premium look and feel, making products appear more expensive and durable. They can also differentiate a brand or product line.
-
Improved Functionality: Textures can provide a better grip (e.g., on tool handles or medical devices), reduce glare on glossy surfaces (e.g., on dashboard panels or electronic housings), and improve tactile feedback.
-
Hiding Imperfections: A textured surface is excellent for concealing minor scratches, scuffs, and other cosmetic defects that might occur during the manufacturing or handling process. It can also help hide flow lines, sink marks, or other molding defects.
-
Increased Durability: Some textures can enhance scratch and wear resistance, prolonging the product's lifespan.
-
Demolding Assistance: In some cases, a carefully selected texture can help with demolding by breaking the vacuum seal between the part and the mold, especially on large, flat surfaces.
Types of Injection Mold Textures
The world of injection mold textures is vast, but it is largely standardized by a system developed by the Society of the Plastics Industry (SPI). Understanding these standards is crucial for specifying the exact finish required for a part.
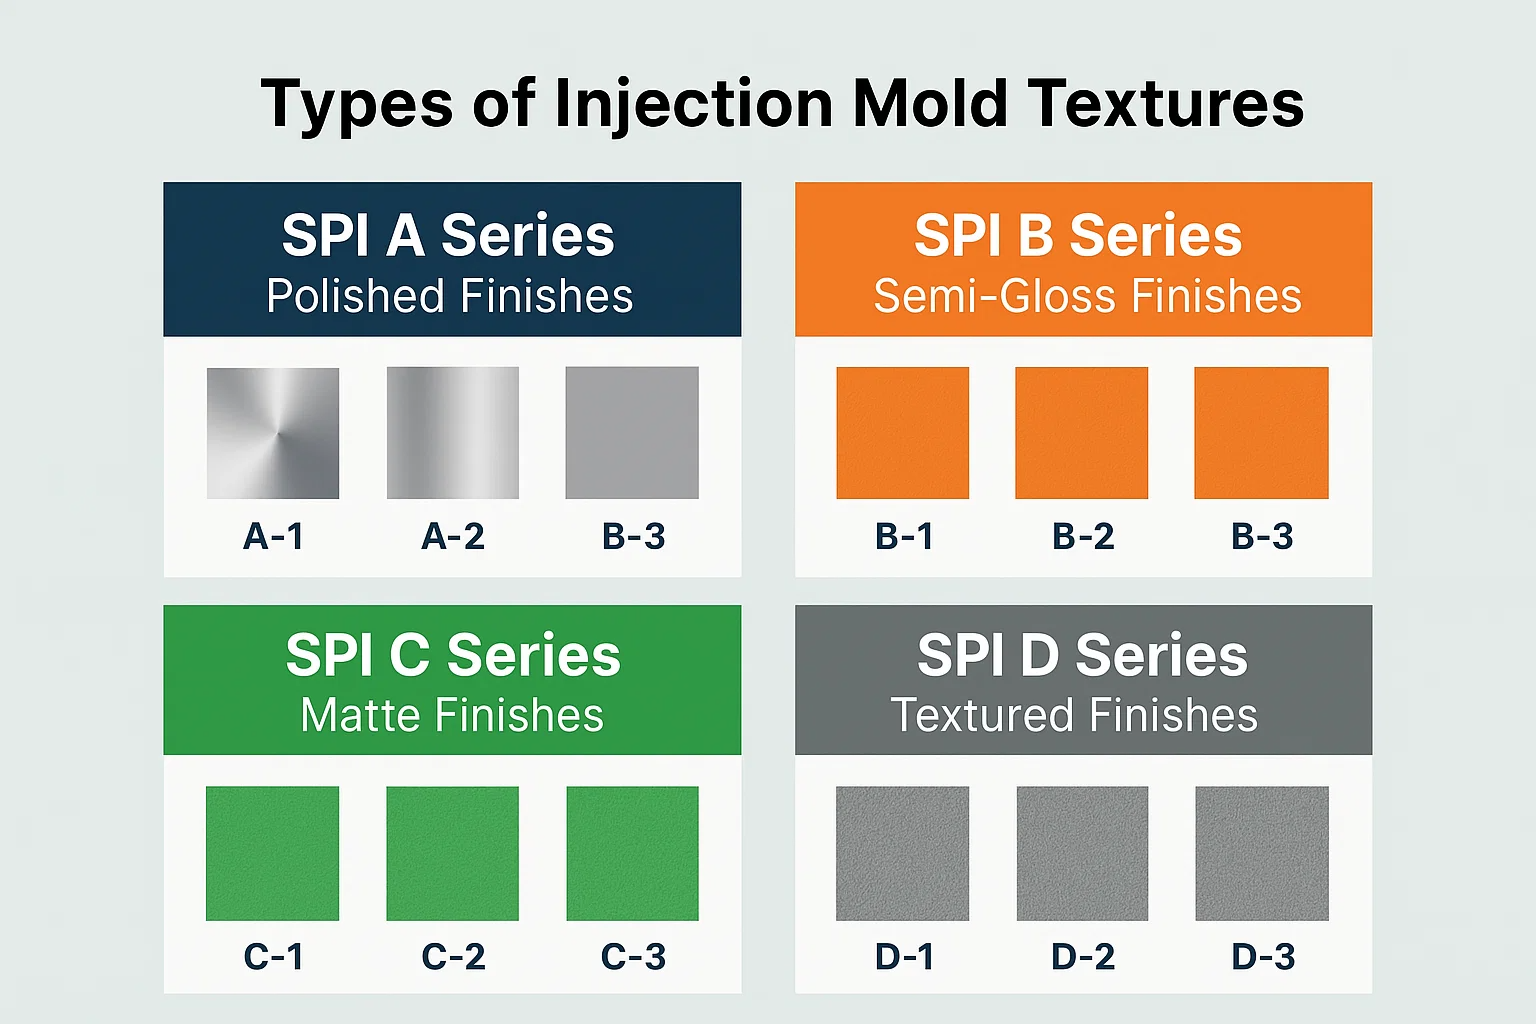
SPI (Society of the Plastics Industry) Finish Standards
The SPI system categorizes finishes based on the method used to achieve them and their resulting appearance, ranging from a highly polished, mirror-like surface to a dull, matte texture. The standards are divided into four main groups (A, B, C, and D), each with three sub-grades.
-
SPI-A Series (Polished Finishes) These are the smoothest and most reflective finishes, achieved by polishing the mold with diamond powder. They are ideal for applications requiring high clarity, gloss, or a mirror finish.
-
A-1: The highest possible finish, polished with a 3-micron diamond buff. It's a true optical finish, used for lenses, mirrors, and transparent parts.
-
A-2: Polished with a 6-micron diamond buff. Offers a high gloss, common for consumer electronics housings and clear plastic products.
-
A-3: Polished with a 15-micron diamond buff. Still very glossy, used for a wide range of parts where a high-quality, reflective surface is desired.
-
-
SPI-B Series (Semi-Gloss Finishes) These finishes are created by polishing with fine grit sandpaper, resulting in a slightly less reflective surface than the A series. They have a good sheen but are not mirror-like.
-
B-1: Polished with a 400-grit stone. This is a very common finish, providing a semi-gloss sheen on parts like appliance housings and medical devices.
-
B-2: Polished with a 320-grit stone. A slightly less refined semi-gloss finish.
-
B-3: Polished with a 220-grit stone. Provides a good, non-reflective surface.
-
-
SPI-C Series (Matte Finishes) These are non-glossy, matte finishes created by stoneworking. They are excellent for reducing glare and are often used on parts that need to be handled frequently.
-
C-1: Stoneworked with a 220-grit stone, offering a uniform, matte texture.
-
C-2: Stoneworked with a 180-grit stone. A slightly coarser matte finish.
-
C-3: Stoneworked with a 150-grit stone. The coarsest of the matte finishes.
-
-
SPI-D Series (Dull/Textured Finishes) The D series finishes are the dullest, achieved by media blasting. This process uses tiny glass or sand particles to create a textured, non-reflective surface.
-
D-1: Blasted with a #11 glass bead. The finest of the blasted textures, providing a very uniform, dull finish.
-
D-2: Blasted with #12 glass bead. A slightly more textured, dull finish.
-
D-3: Blasted with a #240 sand blast. The coarsest SPI finish, used when maximum dullness and a tactile feel are needed.
-
Texturing Techniques
Beyond the SPI standards, which primarily define theresult, there are varioustechniquesused to apply texture to a mold.
-
Chemical Etching: This is the most traditional method. The mold's surface is coated with a photosensitive mask, and a photographic negative of the desired texture pattern is placed on top. The mold is then exposed to UV light, which hardens the mask in the unmasked areas. An acid solution is then applied to "etch" or eat away at the exposed steel, creating the texture.
-
Advantages: Can create intricate, detailed, and deep textures; suitable for large surfaces.
-
Limitations: Less precise than laser, can be difficult to control depth uniformity, and uses harsh chemicals.
-
-
Laser Engraving: A modern and highly precise method that uses a focused laser beam to burn or ablate a texture pattern directly onto the mold's surface.
-
Advantages: Extremely precise, allows for complex geometric patterns, logos, and micro-textures; no chemicals are used.
-
Limitations: Can be slower for very large surfaces, may be more expensive than chemical etching.
-
-
Mechanical Texturing: This technique involves using tools to physically create the texture. This can include abrasive blasting (as in the SPI D series), or using specialized cutting tools. It's often used for simpler, more uniform textures.
-
Other Techniques:
-
EDM (Electrical Discharge Machining): Uses an electrode to create a discharge that erodes the mold's surface, creating a unique "sparkle" texture.
-
Media Blasting: A more general term for blasting with different media (e.g., glass beads, walnut shells) to achieve a desired matte or textured finish.
-
Factors Influencing Texture Selection
Choosing the right mold texture for a part is a critical decision that balances aesthetics, functionality, and manufacturing constraints. The selection process is rarely a one-size-fits-all approach and depends heavily on three key factors: the material of the part, its design, and its final application requirements.
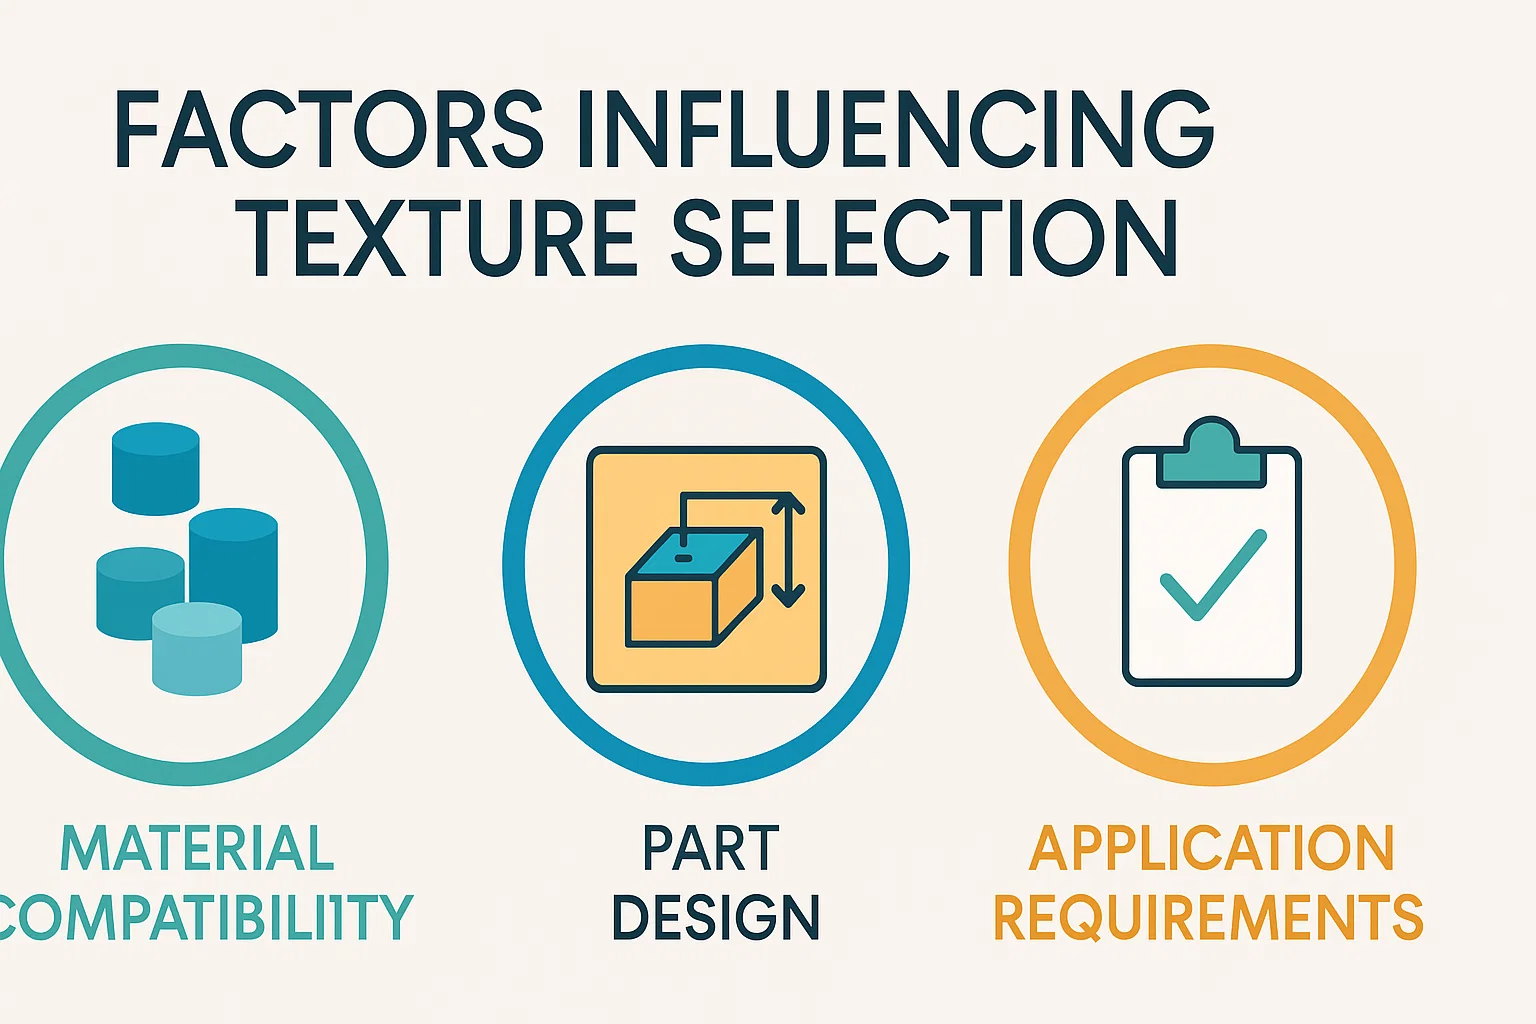
Material Compatibility
The type of plastic used in the injection molding process is a primary consideration. Different materials react to texturing differently, and some hold texture better than others.
-
Polypropylene (PP) and Polyethylene (PE): These are soft, semi-crystalline plastics that can be challenging to texture deeply. They have a tendency to "flow out" of the texture during molding, which can result in a less defined finish. Coarser textures are generally more effective on these materials.
-
Acrylonitrile Butadiene Styrene (ABS): ABS is an excellent material for texturing. Its amorphous structure and good flow properties allow it to capture even fine details, making it a popular choice for parts with intricate textures, such as consumer electronics housings.
-
Polycarbonate (PC): PC is another material that holds texture well, especially for matte finishes. However, its high processing temperature requires careful mold design and processing to avoid stress marks.
-
High-Density Polyethylene (HDPE): Similar to PP, HDPE can be difficult to texture. The texture may appear less sharp and can have a slightly shiny or waxy look.
Part Design
The geometry of the part itself has a significant impact on texture application and quality.
-
Draft Angles: A draft angle is the slight taper designed into a part to allow for easier ejection from the mold. Textures, especially deeper ones, can increase the friction between the part and the mold wall. To prevent demolding issues, the draft angle should be increased for parts with textured surfaces. A good rule of thumb is to add at least 1 degree of draft for every 0.001 inches of texture depth.
-
Radii and Corners: Textures can appear washed out or uneven in areas with small radii or sharp corners. It's often necessary to specify a smooth, un-textured radius to ensure a clean transition.
-
Uniformity: It's crucial to consider the parting line and any potential mold shut-offs when texturing. The texture must be applied uniformly across the entire surface to avoid visible inconsistencies.
Application Requirements
The end-use of the product dictates whether the texture should prioritize aesthetics, functionality, or both.
-
Aesthetic Considerations: Does the part need to look luxurious, rugged, or sleek? A high-gloss SPI A-1 finish might be perfect for a transparent lens, while a fine SPI B-2 or C-1 matte finish would be ideal for a dashboard component to reduce glare.
-
Functional Requirements:
-
Grip: For products like tool handles, medical instruments, or sporting goods, a deeper, tactile texture (like an SPI D finish) is essential for providing a secure grip and preventing slippage.
-
Wear Resistance and Hiding Scratches: A textured surface is naturally more forgiving than a polished one. A product that will see heavy use, such as a garden tool or a piece of luggage, will benefit from a robust texture that can hide minor scratches and scuffs.
-
Glare Reduction: For components in a car's interior or the bezel of a TV, a matte finish is critical for eliminating distracting reflections.
-
Applications of Injection Mold Texture
The versatility of injection mold texture is evident in its widespread use across countless industries. From giving a car's interior a luxurious feel to ensuring a medical device has a non-slip grip, texture is a key design element.
Automotive Industry
The automotive sector is a major user of mold textures, primarily for both aesthetic appeal and functional performance.
-
Interior Components: Textures are used on dashboards, door panels, and center consoles to reduce glare and create a high-quality, non-reflective finish. The texture also makes these surfaces more durable and resistant to scratches from daily use. A fine to medium matte texture (SPI B or C series) is most common here.
-
Exterior Components: Bumpers, body trim, and grille components often feature textures that resist dings and scuffs, and are easier to maintain than a painted, high-gloss surface.
Consumer Electronics
Texture is a crucial element in consumer electronics, where a product's tactile feel can be a major differentiator.
-
Cell Phone Cases and Accessories: Textures on phone cases not only provide a better grip but also hide fingerprints and minor abrasions.
-
Appliance Housings: The housings for everything from coffee makers to vacuum cleaners use textures to create a durable, attractive surface that is easy to clean.
Medical Devices
In the medical field, texture is not just about looks; it's about safety and ergonomics.
-
Device Housings: Housings for portable medical devices use textures to provide a secure grip, which is essential for doctors and nurses. The texture can also help hide smudges and fingerprints in a clinical setting.
-
Ergonomic Grips: Syringe plungers, surgical instrument handles, and other handheld devices feature tactile textures to prevent slippage during critical procedures.
Household Products
From the kitchen to the garage, textured surfaces are everywhere, often for practical reasons.
-
Containers and Storage: Food containers, lids, and other plastic storage products often have a matte or textured finish to prevent them from slipping out of wet hands. The texture also helps to mask scratches from regular use.
-
Furniture Components: Plastic chairs, tables, and other furniture items use textures to mimic the look of natural materials, like wood grain, or to simply create a more appealing, non-reflective finish.
Advantages and Disadvantages of Different Textures
Like any design choice, selecting a mold texture involves a trade-off. Understanding the pros and cons is essential for making an informed decision.
Advantages
-
Improved Aesthetics: A well-designed texture can elevate a product's perceived value and give it a premium feel.
-
Enhanced Grip: Textures add friction, making products easier to handle and less prone to slipping.
-
Reduced Gloss and Glare: Matte textures effectively reduce light reflection, which is a critical safety and comfort feature in automotive and electronics applications.
-
Scratch Resistance: Textured surfaces are inherently more durable and better at hiding minor scratches and wear than smooth, polished surfaces.
-
Hiding Imperfections: Texture can conceal minor molding defects, such as sink marks, flow lines, and weld lines, which might be very visible on a glossy part.
Disadvantages
-
Increased Cost: The process of texturing a mold is an additional step in the manufacturing process and requires specialized equipment and expertise. This adds to the overall tooling cost.
-
Longer Cycle Times: In some cases, deeper textures can slightly increase the cooling time needed before a part can be safely ejected, potentially lengthening the overall injection molding cycle.
-
Potential for Sink Marks: Very deep or abrupt texture changes on thick parts can sometimes make a part more prone to sink marks, which are slight depressions on the surface.
-
Demolding Challenges: As mentioned previously, textures increase friction between the part and the mold. Without adequate draft angles, this can lead to demolding issues, such as parts sticking in the cavity or scuffing.
The Process of Adding Texture to Injection Molds
The process of adding texture to an injection mold is a precision-driven craft that requires careful planning and execution. It's a multi-step procedure that bridges the gap between digital design and physical manufacturing.
Design Considerations
The texturing process begins long before the mold is made, during the product design phase.
-
Texture Mapping: The designer specifies the exact location and type of texture on the 3D CAD model. This involves "mapping" the texture pattern onto the part's surfaces.
-
CAD/CAM Integration: The digital texture data is then integrated into the Computer-Aided Manufacturing (CAM) software, which guides the texturing machine (e.g., a laser engraver) to apply the pattern with millimeter precision.
Mold Preparation
Once the mold components are machined, they must be meticulously prepared for texturing.
-
Surface Preparation: The mold cavity surfaces are polished to a high level of finish (typically SPI A-3 or B-1) to ensure the texture is applied uniformly. Any scratches or imperfections on the polished surface will be visible, even after texturing.
-
Masking: For chemical etching, a resist or mask is applied to the areas of the mold that should remain smooth, such as shut-off surfaces, core pins, and deep pockets. This protects these areas from the acid solution.
Texturing Execution
This is the most critical stage, where the texture is physically applied to the mold.
-
Chemical Etching Process: The prepared mold is submerged in an acid bath. The acid "eats away" at the unmasked surfaces, creating the desired texture depth and pattern. The process is carefully timed to achieve the precise texture depth.
-
Laser Engraving Process: The mold is placed in a laser engraving machine. The machine uses the CAD data to precisely fire a laser beam across the mold surface, creating the texture by ablating or melting the steel.
Troubleshooting Texture Defects
Even with a well-planned process, defects can sometimes occur. Recognizing these issues and their causes is key to successful texture application.
Common Defects
-
Orange Peel: This defect, which resembles the skin of an orange, occurs when the plastic does not fully replicate the texture, leaving a rough, uneven surface.
-
Uneven Texture: This happens when the texture on the part is inconsistent, with some areas appearing more pronounced or dull than others.
-
Texture Loss: The texture appears to be "washed out" or non-existent in certain areas of the part, particularly in deep cavities or near the gate.
Causes and Solutions
-
Material Issues: Inconsistent material flow or a low melt temperature can prevent the plastic from filling the texture details. Solution: Optimize the injection molding process parameters, such as melt temperature and injection speed.
-
Process Parameters: Insufficient clamping force or a low injection pressure can lead to poor texture replication. Solution: Increase injection pressure and adjust the pack and hold pressure to ensure the plastic is pushed into every detail of the mold surface.
-
Mold Maintenance: A dirty or poorly maintained mold can cause texture defects. Contaminants can block the texture pattern. Solution: Regular mold cleaning and maintenance are essential for consistent results.
Cost Considerations for Injection Mold Texturing
The decision to texture a mold is not just a technical one; it has significant financial implications. The cost of texturing is a factor that must be weighed against the potential benefits, such as enhanced product value, improved functionality, and reduced post-production processes.
Factors Affecting Cost
-
Texture Complexity: The more intricate or detailed the texture pattern, the higher the cost. Simple, uniform textures (like SPI D series) are generally less expensive than complex, multi-pattern designs or those requiring multiple masks in chemical etching.
-
Mold Size: The surface area of the mold to be textured is a primary cost driver. Texturing a large automotive dashboard mold will cost significantly more than texturing a small electronic component mold.
-
Texturing Method: Different methods have different cost structures.
-
Chemical Etching: Often more cost-effective for large, less complex textures.
-
Laser Engraving: While more expensive upfront, its precision can reduce rework and is the only option for some complex geometries and micro-textures.
-
Cost-Benefit Analysis
Before committing to a textured mold, a thorough cost-benefit analysis is essential.
-
Weighing the Benefits Against the Costs: Consider the long-term value. While texturing adds to the initial tooling cost, it can eliminate the need for secondary operations like painting, powder coating, or pad printing. The added aesthetic appeal can also command a higher market price for the final product.
-
Reduced Rework: By masking minor surface imperfections and flow lines, a textured finish can reduce the number of rejected parts, saving money in the long run.
Future Trends in Injection Mold Texturing
The field of mold texturing is continually evolving, driven by advancements in technology and the demand for more sophisticated and functional products.
Advancements in Technology
-
Micro-texturing: Modern laser technology allows for the creation of incredibly fine, micro-scale textures. These textures can be used to control light diffusion, create hydrophobic (water-repelling) surfaces, or even provide a haptic (touch-based) feedback experience.
-
Self-healing Textures: Researchers are exploring ways to create textures that can repair themselves from minor scratches, a technology that could revolutionize the durability of plastic parts.
-
Use of AI in Texture Design: Artificial intelligence is being used to generate new and complex texture patterns that are optimized for specific materials and functional requirements, shortening the design cycle and enabling innovative new surface designs.
Conclusion
Injection mold texture is far more than a simple aesthetic choice; it is an integral part of the product design and manufacturing process. From the standard SPI finishes to advanced laser-etched patterns, the right texture can enhance a product's functionality, durability, and perceived value. By carefully considering the material, design, and application requirements, and by understanding the available techniques and their associated costs, designers and engineers can select the perfect surface finish to bring their products to life.

