 English
 Indonesia
In the world of manufacturing, injection molding is a powerful process used to create everything from car dashboards to bottle caps. However, even with modern technology, defects can happen. One of the most common and frustrating of these is the short shot. This defect doesn't just look bad; it creates a non-functional part, leading to wasted materials, production delays, and higher costs. Understanding why short shots occur and how to fix them is essential for anyone involved in plastic part manufacturing. This guide will walk you through the causes, solutions, and prevention methods to help you produce high-quality, complete parts every time.
What is a Short Shot in Injection Molding?
Simply put, a short shot is a molding defect where the molten plastic resin fails to fully fill the mold cavity. Instead of a complete, perfect part, you end up with a component that's incomplete or "short." It's like trying to fill a glass with water but running out before the glass is full. The result is a part that's missing sections, often at the furthest points from where the plastic was injected. Visually, a short shot can appear as a partially formed part, or it may have a smooth, rounded edge where the plastic flow stopped abruptly. Because a short shot is an incomplete part, it's immediately unusable and must be scrapped. It's often a symptom of underlying issues with the machine, mold, or material that need to be diagnosed and corrected.

What Causes Short Shots?
Diagnosing a short shot requires a systematic approach, as the cause can stem from several different areas of the injection molding process. The most common issues can be traced back to the material, the machine settings, or the mold design itself.
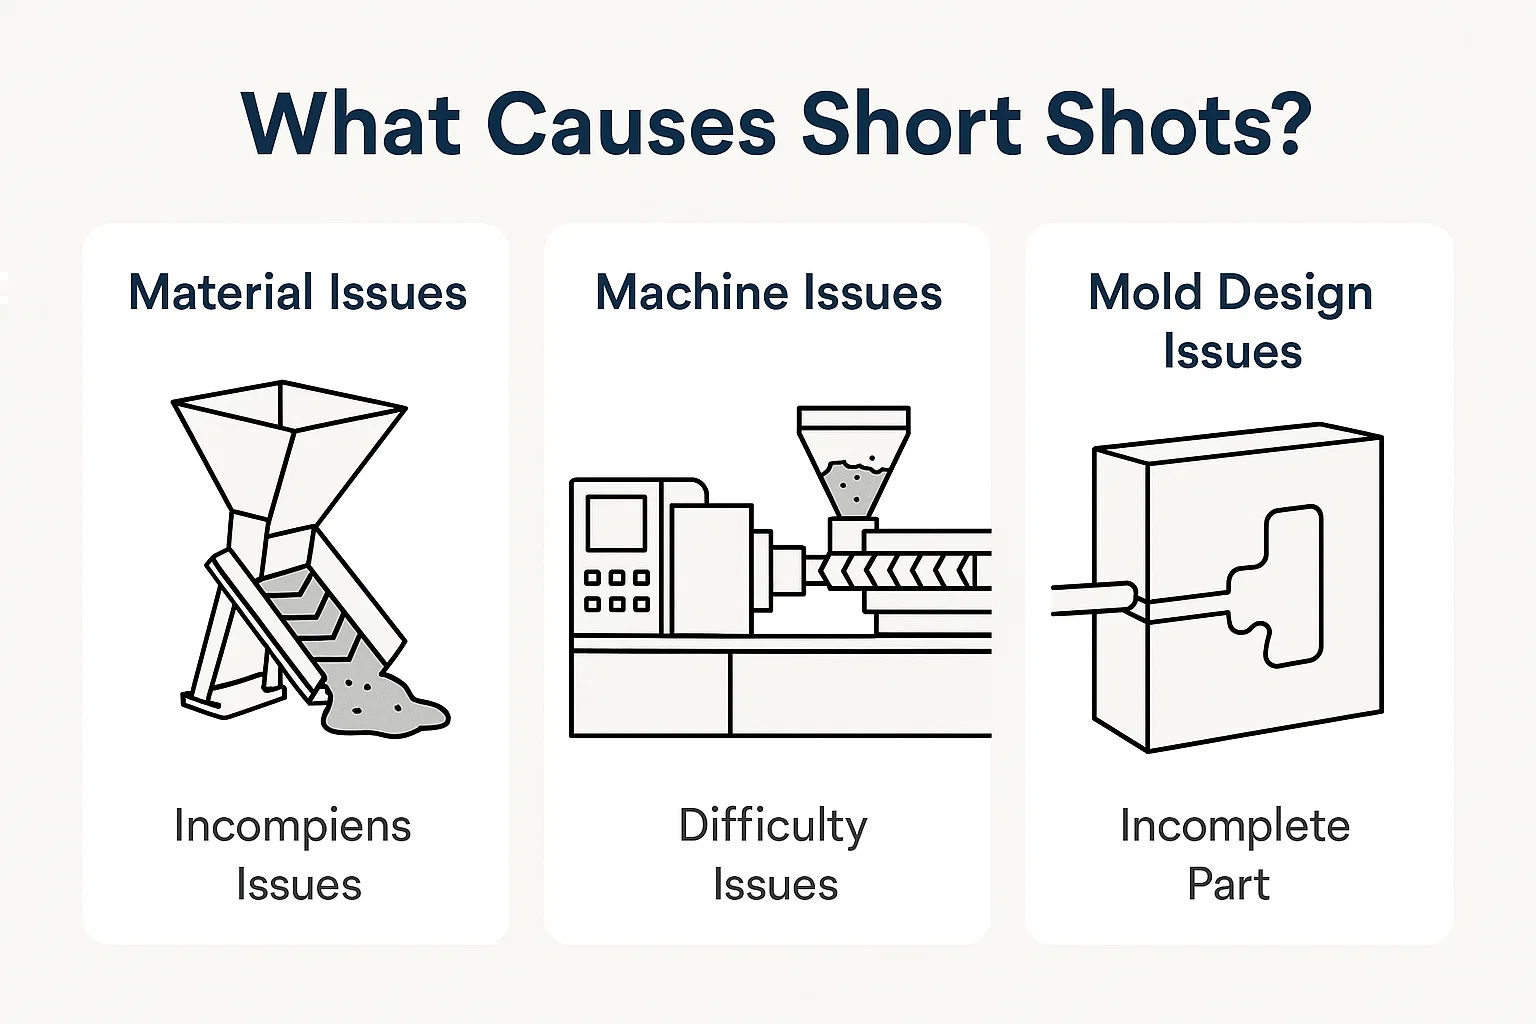
1. Material Issues
The very plastic you are molding can be the root cause of a short shot. Issues with the resin's state or preparation can prevent it from flowing correctly into the mold.
-
Insufficient Material: The most straightforward cause is simply not having enough plastic to fill the mold. This can happen if the injection molding machine's screw isn't advancing far enough to push the required volume of plastic, or if there's a blockage in the feed system.
-
Solutions: Check the machine's material hopper and feeding mechanism to ensure it's not empty or blocked. Increase the shot size on the machine's control panel to deliver a larger volume of material.
-
-
Incorrect Melt Temperature: If the plastic is not heated to the proper temperature, its viscosity (its resistance to flow) will be too high. A thick, "cold" melt struggles to flow through the narrow runners and gates and may solidify before it can fill the entire cavity.
-
Solutions: Consult the material supplier's datasheet for the recommended melt temperature range. Adjust the barrel and nozzle heater temperatures on the machine to increase the plastic's temperature and lower its viscosity.
-
-
Material Viscosity: Even at the correct temperature, some plastics are inherently more viscous (thicker) than others. Materials like polycarbonate and high-impact polystyrene can be more prone to short shots due to their flow characteristics. Additionally, moisture in hygroscopic plastics (those that absorb water, like nylon) can cause them to degrade and lose their flow properties.
-
Solutions: Ensure materials are properly dried before use according to manufacturer specifications. Consider using a lower-viscosity grade of the same material, or a different material altogether with better flow characteristics.
-
2. Machine Issues
The settings on your injection molding machine are critical. Even with the right material and mold, incorrect parameters can easily lead to a short shot.
-
Inadequate Injection Pressure: Pressure is the force that pushes the molten plastic into the mold. If the injection pressure is too low, the plastic will not have enough force to travel to the furthest ends of the cavity.
-
Solutions: Increase the injection pressure setting on the machine. This is often the first and simplest solution to try. However, be cautious not to use excessive pressure, as it can cause other defects like flash.
-
-
Incorrect Injection Speed: The speed at which the plastic is injected also plays a crucial role. If the speed is too slow, the plastic may start to cool and solidify prematurely before the cavity is full. This is especially true for thin-walled parts.
-
Solutions: Increase the injection speed. A faster injection rate can help the plastic reach all parts of the mold before it loses heat and viscosity.
-
-
Ventilation Problems: As plastic fills a mold, the air trapped inside must have a way to escape. If the mold's vents are blocked or improperly sized, the trapped air will create a backpressure that resists the flow of plastic, effectively "shorting" the shot.
-
Solutions: Clean the mold's vents and parting lines. Ensure vent depths are correct (typically 0.0005 to 0.001 inches or 0.013 to 0.025 mm). Consider adding additional vents or a vacuum venting system for complex molds.
-
3. Mold Design Issues
Even with perfect material and machine settings, a poorly designed mold can make it impossible to produce a complete part. These issues are often the most challenging to resolve because they require physical modifications to the tooling.
-
Gate Size and Location: The gate is the opening through which molten plastic enters the mold cavity.
-
Gate Size: If the gate is too small, it can act as a restriction, preventing enough material from flowing into the cavity. The friction from a small gate can also cause the material to cool prematurely.
-
Solutions: Enlarge the gate size. A wider or thicker gate allows for a faster and more efficient flow of plastic.
-
-
Gate Location: An improperly located gate can also lead to a short shot, especially if it's far from the areas that need to be filled last. This increases the flow length and the risk of the plastic cooling before it reaches the end of the cavity.
-
Solutions: Relocate the gate to a more central or optimal position to ensure all areas of the part can be filled evenly. For complex parts, multiple gates may be necessary.
-
-
-
Runner System Design: The runner system is a network of channels that directs the plastic from the machine nozzle to the gates.
-
Runner Size and Layout: A runner system that is too small or too long can cause a significant pressure drop, meaning there isn't enough force to push the plastic all the way to the end of the mold cavity.
-
Solutions: Increase the diameter of the runners to reduce pressure loss and improve flow. Redesign the runner layout to be more direct and balanced, ensuring all cavities (in a multi-cavity mold) fill at the same rate.
-
-
-
Wall Thickness: Thin wall sections on a part design can be a major cause of short shots. Molten plastic cools very quickly, and if it has to flow through a very thin area, it may solidify before it reaches the other side, creating an incomplete part.
-
Solutions: Modify the part design to increase the wall thickness in the problematic areas. While this may not always be possible, it is an important consideration during the initial design phase. For existing molds, you may need to use a more fluid material, higher temperatures, or faster injection speeds to compensate.
-
How to Identify Short Shots
Identifying a short shot is usually straightforward, as it's a very visible defect. However, a systematic approach helps to confirm the issue and pinpoint its exact location, which is crucial for effective troubleshooting.
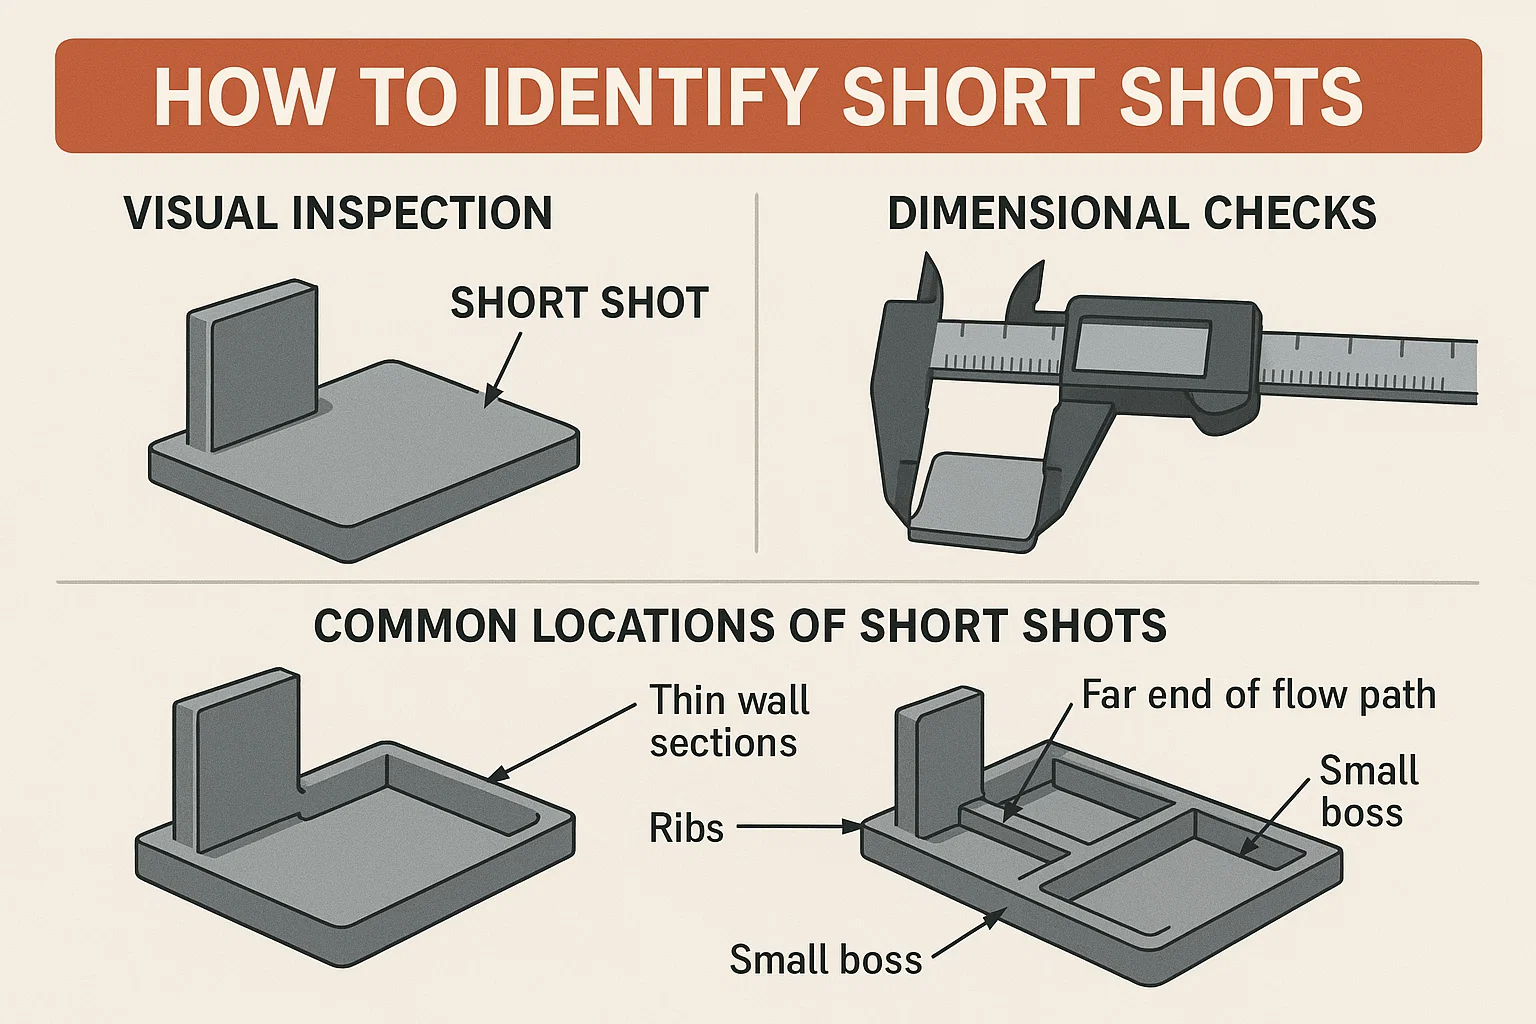
Visual Inspection
The most common way to spot a short shot is through a quick visual check. A short shot is immediately obvious because the part is incomplete. You'll notice that sections of the part are missing or that the part ends abruptly with a rounded, unfinished edge where the plastic flow stopped. This is typically a smooth, curved surface because the molten plastic's surface tension causes it to pull back slightly as it solidifies. This is a telltale sign that the mold cavity was not filled.
Dimensional Checks
While a visual check is often enough, performing a dimensional check can provide more specific information, especially for parts with complex geometries. If you have a part that looksalmostcomplete but you're unsure, measure its length, width, and height. A short shot will fail to meet the required dimensions, as the part won't have filled the entire mold cavity. For parts with thin walls, a short shot may not be visibly obvious at first, but a dimensional check will confirm the problem.
Common Locations of Short Shots
Short shots almost always occur at the end of the flow path, which is the point furthest from the gate where the plastic enters the cavity. The molten plastic loses heat and pressure as it travels, so the last areas to fill are the most susceptible to a short shot. These areas are often:
-
Thin wall sections.
-
Ribs or small bosses.
-
Features that are a long distance from the gate.
-
Areas with poor or no venting.
By knowing where to look, you can quickly confirm a short shot and begin to link it to the potential causes discussed earlier.
Solutions for Short Shots
Solving a short shot requires a strategic approach. It's often best to start with the easiest and most cost-effective solutions before moving to more complex and expensive ones. Start with machine settings, then consider material, and finally, look at the mold itself.
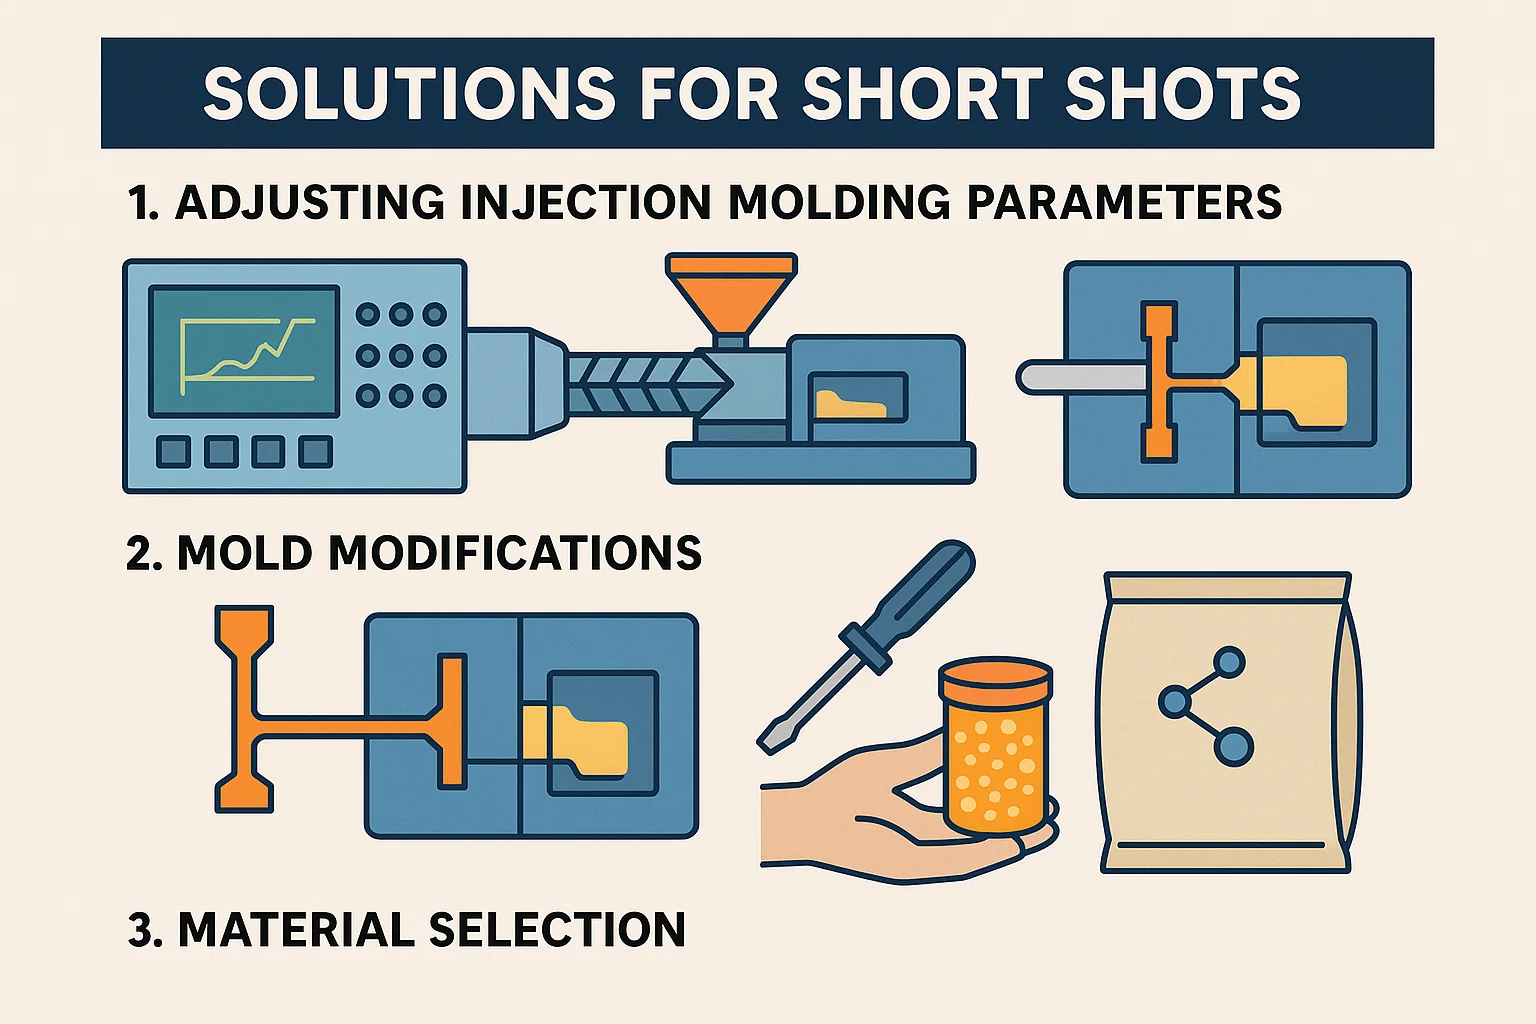
1. Adjusting Injection Molding Parameters
The quickest and most common way to fix a short shot is by making adjustments to the machine's settings. These changes can often be made on the control panel without stopping production for long.
-
Increasing Injection Pressure: This is usually the first and most effective solution. By increasing the pressure, you give the molten plastic more force to travel through the mold, helping it fill even the most difficult-to-reach areas. Increase the pressure in small increments (e.g., 50-100 PSI) until the part is complete.
-
Optimizing Injection Speed: A faster injection speed can help fill the mold before the plastic has a chance to cool and solidify. This is particularly important for thin-walled parts or those with long flow paths. Just like with pressure, increase the speed gradually to avoid other defects like flash or burn marks.
-
Modifying Melt Temperature: A higher melt temperature will lower the plastic's viscosity, making it flow more easily. Check the material's datasheet for the recommended temperature range and increase the barrel and nozzle temperatures to improve fluidity. This can be a very effective solution, but be mindful not to overheat the material, which can cause degradation.
2. Mold Modifications
If adjusting machine parameters doesn't solve the problem, the issue may be with the mold itself. These solutions require shutting down the machine and physically modifying the tool. While more costly, they provide a long-term fix.
-
Gate and Runner Adjustments: The size and design of the gate and runners are critical for proper flow. If they are too small, they can restrict the flow of plastic. Enlarging the gate or widening the runners will allow more material to flow into the cavity with less resistance. For multi-cavity molds, balancing the runners is also key to ensure each cavity fills evenly.
-
Improving Venting: Trapped air in the mold can act as a cushion, preventing the plastic from filling the cavity. Cleaning existing vents is a simple first step. If the problem persists, a mold maker may need to add additional vents to the mold at the points where the short shot is occurring. In some cases, a vacuum venting system can be installed to actively pull air out of the mold.
-
Heating System Enhancements: For complex molds or thick-walled parts, a hot runner system can be used. Unlike cold runners, hot runners keep the plastic molten right up to the gate, eliminating the need to reheat and ensuring a more consistent temperature and easier flow.
3. Material Selection
Sometimes, the simplest solution is to switch materials or ensure the current one is prepared properly.
-
Choosing the Right Material Grade: Within a single type of plastic, there are different grades with varying flow properties. If you are using a material with a low melt flow rate (MFR), consider switching to a higher MFR grade, which is designed to flow more easily.
-
Material Drying Techniques: Many hygroscopic plastics (like nylon, ABS, and polycarbonate) absorb moisture from the air. When molded, this moisture turns to steam, which can impede plastic flow and cause short shots. Always ensure your material is properly dried in a hot air or desiccant dryer before processing.
Preventing Short Shots
The best way to deal with a short shot is to prevent it from happening in the first place. Proactive measures in the design and maintenance phases can save significant time and money down the line.
-
Design for Manufacturing (DFM) Principles: This is a crucial first step. DFM involves designing a part with the manufacturing process in mind. When it comes to injection molding, this means:
-
Uniform Wall Thickness: Avoid dramatic changes in wall thickness. This ensures the plastic flows and cools at a consistent rate, preventing short shots in thin sections.
-
Appropriate Rib and Boss Design: Ensure that ribs, bosses, and other features are designed with proper draft angles and fillets to facilitate easy plastic flow and prevent air traps.
-
Minimize Flow Length: Design the part so the plastic doesn't have to travel an excessively long distance from the gate, reducing the risk of premature cooling.
-
-
Regular Machine Maintenance: A well-maintained machine is a reliable machine. Regularly checking and servicing your injection molding machine can prevent many issues that lead to short shots.
-
Clean Nozzles and Barrels: Ensure there are no blockages or build-ups of solidified plastic that could restrict material flow.
-
Check Heater Bands and Thermocouples: Verify that all heating elements are functioning correctly to ensure the plastic is melting uniformly and reaching the desired temperature.
-
-
Material Handling Best Practices: Proper material storage and preparation are essential.
-
Correct Drying: Always dry hygroscopic materials as recommended by the supplier. This is perhaps the single most important preventive step for these materials.
-
Proper Storage: Store resins in sealed, climate-controlled environments to prevent moisture absorption and contamination.
-
Case Studies
Real-world examples illustrate how the principles of troubleshooting short shots apply in practice. These case studies highlight the importance of systematic diagnosis.
-
Case Study 1: The Thin-Walled Electronics Casing
-
Problem: A manufacturer was producing a thin-walled casing for a consumer electronics device. The parts consistently came out with a short shot in a corner furthest from the gate.
-
Diagnosis: Initial attempts to increase pressure and speed failed, causing flash (excess plastic) on other parts of the mold. A detailed analysis showed that the plastic was cooling too quickly as it flowed through the thin section.
-
Solution: The team determined that the melt temperature was too low for the part's thin geometry. They increased the barrel and nozzle temperature by 20°F, which lowered the plastic's viscosity just enough to allow it to fill the entire cavity without requiring excessive pressure. The parts were then produced without defects.
-
-
Case Study 2: The Multi-Cavity Cap Mold
-
Problem: A mold with four identical cavities was producing short shots in one or two cavities while the others filled perfectly.
-
Diagnosis: Since the short shots were localized to specific cavities, the problem wasn't related to machine settings or material. It was a mold design issue. A visual inspection of the runners revealed that the runner leading to the short-shot cavities was slightly longer and thinner than the others, causing a pressure imbalance.
-
Solution: The mold was sent to a tool shop where the runners were re-machined to be of uniform length and diameter. This balanced the runner system, ensuring that plastic flowed with equal pressure to all four cavities, eliminating the short shots.
-
Advanced Techniques
For high-volume production or complex parts, a more scientific approach to diagnosing and preventing short shots can save immense amounts of time and money.
-
Mold Flow Analysis: Before a mold is even built, Mold Flow Analysis (MFA) software can simulate the injection molding process. It predicts how molten plastic will fill a cavity, identifying potential problem areas like short shots, air traps, and weld lines. Using MFA, engineers can optimize gate locations, runner systems, and part wall thickness to prevent defects before any steel is cut.
-
Sensors and Monitoring Systems: Modern injection molding machines can be equipped with sensors that provide real-time data on pressure, temperature, and speed. In-mold pressure sensors are particularly useful; they measure the pressure inside the cavity and can detect a short shot in a fraction of a second, allowing the machine to be stopped automatically. This level of monitoring enables operators to make precise, data-driven adjustments and ensures consistent part quality.
Conclusion
A short shot is more than just a visible defect; it's a clear signal that something in the injection molding process, machine, or mold design is out of sync. While they are a common frustration in manufacturing, they are also a solvable problem. By systematically diagnosing the root cause—whether it's an issue with the material, the machine settings, or the mold itself—you can implement effective solutions and get production back on track.
The key to long-term success, however, lies in prevention. By embracing principles like Design for Manufacturing (DFM) and implementing regular maintenance and proper material handling, you can minimize the risk of short shots before they even occur. And for complex or high-volume projects, advanced tools like Mold Flow Analysis and in-mold sensors offer a powerful way to ensure quality and efficiency from the very beginning. Ultimately, understanding and addressing short shots is not just about fixing a defect, but about optimizing your entire injection molding operation for consistent, high-quality results.

