 English
 Indonesia
To achieve the production of products with speckled effects in injection molding, it is necessary to comprehensively apply material selection, process parameter optimization, mold design and post-processing technology.
一: Selection of materials and additives
1. Special speckled pigments and masterbatches
Masterbatches and speckling agents: Use masterbatches containing speckling agents (such as metal powders and pearlescent pigments). For example, metal speckled powder coatings are composed of resins, speckling agents and aluminum powders. The size and density of the speckles can be controlled by adjusting the amount of speckling agents. Carbon black masterbatches can provide a dark base and mix with light-colored resins to form contrasting speckles.
Natural modified materials: such as coffee modified materials, after adding coffee particles to the polymer, dark brown speckles can be naturally formed, while releasing a slight coffee aroma, which is suitable for environmentally friendly packaging products.
Dispersion control: Deliberately reduce the uniformity of pigment dispersion, and form random speckles through low shear mixing or using masterbatches with poor dispersion.
2. Multi-component material blending
Two-color/multi-color injection molding: Through multi-color injection technology (similar to multi-color layer corneal pigmentation), different colors of melt are injected into the mold cavity in stages to form a mottled effect. A multi-component injection molding machine is required and the injection sequence is optimized.
Incompatible resin mixing: For example, PC/ABS is blended with a small amount of incompatible polymers (such as PE), and a microphase-separated spot structure is formed through melt flow differences.
Mixing resin particles of different colors
Highlights: Simple and easy, low cost, suitable for small batch or experimental production.
Points to be optimized:
Material compatibility: It is necessary to ensure that the mixed resin particles are of the same substrate (such as PP or ABS), otherwise it may cause stratification or strength problems due to differences in melt temperature/viscosity.
Process coordination: It is necessary to combine low-temperature plasticization + low-speed injection (such as reducing the melt temperature by 10-20℃ and the injection speed to 20-30 mm/s), and reduce the shear force to avoid excessive dispersion of the pigment to form spots instead of uniform mixing.
Particle size: It is recommended to use particles with large differences in particle size (such as a mixture of 1 mm and 3 mm) to form natural aggregation using the difference in melting speed.
Use masterbatch or color masterbatch
Highlights: Strong controllability, suitable for large-scale production.
Points to be optimized:
Dispersion control: If a spot effect is required, it is necessary to deliberately reduce the uniformity of dispersion (such as switching to a low shear screw, reducing back pressure, or using a masterbatch with poor dispersion).
Concentration gradient: A "starvation feeding" strategy can be adopted (such as reducing the amount of masterbatch added from 3% to 1.5%) to form spots using local concentration differences.
Co-injection/multi-component molding
Highlights: High pattern controllability, suitable for complex designs.
Points to be optimized:
Injection timing: Inject the base material first, delay 0.5-1 second before injecting the spot material, and form natural penetration through the disturbance of the melt front.
Mold design: Refer to the asymmetric layout of multiple gates I mentioned, and use turbulence to enhance the randomness of spots (such as a combination of star gates + fan gates).
In-mold decoration (IMD/IML)
Highlights: High surface accuracy, suitable for logo or local decoration.
Limitations: Spots only exist on the surface (about 0.1-0.3 mm). If a spot effect that penetrates the thickness is required, other methods must be combined.
二. Process parameter optimization
1. Injection speed and pressure control
Low-speed injection: Reduce the injection speed so that the pigment or filler gathers in the melt due to insufficient shear force, forming local spots. Suitable for the combination of light-colored base + dark spots.
Variable-speed injection: Use a segmented injection curve, with an initial low speed to avoid excessive shearing and dispersion of the pigment, and high-speed filling in the later stage to reduce shrinkage.
2. Temperature and plasticization parameters
Melt temperature: Appropriately reduce the melt temperature (such as PC/ABS from 280℃ to 260℃), increase the melt viscosity, and reduce pigment diffusion.
Screw back pressure: Increasing the back pressure (such as from 5 MPa to 8 MPa) can enhance plasticization uniformity, but if a spot effect is required, the back pressure can be reduced to retain pigment aggregation.
3. Mold temperature control
Mold temperature gradient design: The temperature difference is formed by local heating (such as near the gate) and cooling (away from the gate area), resulting in different melt solidification speeds and producing glossy patterns.
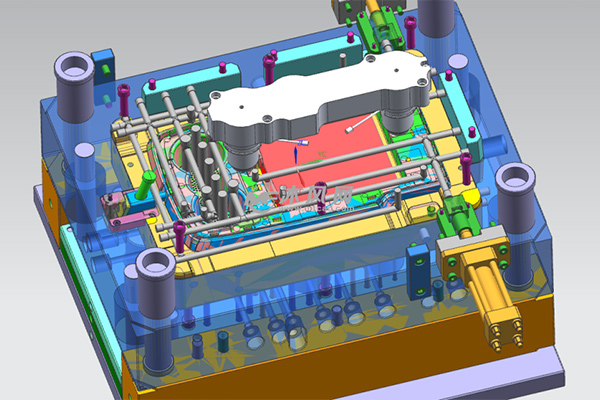
三. Mold design optimization
1. Gate and runner design
Enlarge the gate diameter: reduce shear heat during high-speed injection and avoid excessive dispersion of pigments. For example, increase the gate diameter from 1.5 mm to 2.5 mm.
Rounding of runner transition: The transition area from the gate to the mold cavity is rounded to slow down the melt flow rate and promote pigment aggregation.
Multi-gate layout: Asymmetric gate design is used to guide the melt to form turbulence and enhance the uneven mixing of different colors or fillers.
2. Cavity surface treatment
Texture etching: Process micro grooves or rough areas (Ra 1.6-3.2 μm) on the mold surface to cause local retention of the melt when it contacts the mold wall, producing a matte or spot effect.
Local coating: chrome or titanium nitride is plated in specific areas to change the cooling rate of the melt and form patterns with contrasting gloss.
四. Post-processing process
1. Surface spraying and coating
Spraying spot paint: Spraying a coating containing metal particles or pearlescent pigments on the surface of the product to form artificial spots by masking or local attachment (reference metal spot paint).
Electrochemical etching: Use masking technology to locally etch the surface of the product to generate matte or concave spots (similar to
image processing logic).
2. Hot embossing and laser engraving
Hot embossing texture: Press a mold with a spot pattern on the surface of the product to form a concave and convex texture by local heating (reference mold cavity design).
Laser marking: Use laser to ablate micron-level spots on the surface, suitable for high-precision patterns (femtosecond laser technology).
五. Quality and effect control
1. Simulation analysis
Mold flow analysis software (such as Moldex3D): predict Von Mises stress distribution, optimize gate position and injection parameters, and ensure uniformity and aesthetics of spot distribution.
Dispersion test: observe the dispersion state of the pigment through a microscope and adjust the mixing process.
2. Experimental verification
DOE (Experimental Design): Use Taguchi method or full factorial design to screen the key parameters that affect the spot effect (such as injection speed, melt temperature, pigment concentration).
Rapid mold trial: verify the spot effect through small batch mold trial to avoid excessive adjustment costs during mass production.
六. Common problems and solutions
Uneven spot distribution
Reason: poor pigment dispersion or injection parameter fluctuations.
Countermeasure: Improve the mixing capacity of the screw, or use a high shear screw (double-thread corrugated screw technology).
Spot size is too large
Reason: The pigment concentration is too high or the melt temperature is too low.
Countermeasure: Reduce the amount of pigment added (such as from 5% to 2%), and increase the melt temperature by 10-20℃.
Surface gloss is inconsistent
Reason: unreasonable mold temperature gradient.
Countermeasure: Optimize mold temperature control to ensure that the temperature difference between each area is ≤5℃.

